Saturday, September 29, 2007

Braised Pork Feet

Warning: This recipe post is for pork feet, an exotic Asian dish. Close-minded eaters, please refer to the "back" button on your web browser.
Now let's continue.....


The last time I ate pork feet was over 10 years ago. But I remember it was always one of my favorite dishes my mom made. However, as my family became more health conscious and vegetable-oriented, my mom stopped making pork feet.

The other day at Food-4-Less, I saw a pork feet in the meat section, and gave it sad look, exclaiming how I used to love eating pork feet as a child. My boyfriend said to get it anyways, even though I had no idea how to prepare pork feet. I figured that I could easily find a recipe online, so I purchased a 4.5 pound bag of pork feet.

When I searched online for pork feet cooking tips or recipes, I could not find a recipe that looked remotely close to what my mom used to make.
Instead, I kept pulling up a Chinese (Cantonese) recipe for vinegar pork feet, with tons of reviews saying how delicious that dish is.

I decided to follow the vinegar pork recipe a try, and needless to say,
Holy CRAP, the dish came out tasting like crap!
I was so disappointed, so disgusted, and so dejected.

Day two, I decided to try cooking the pig feet again.
I decided to do something simple, so simple it can't possibly go wrong:
Braise the pork in soy sauce!


For those who do not know, to BRAISE is to slowly cook vegetables or meat in a small amount of liquid, in a closed container
YUM.
The pork feet came out so tender, flavorful, and delicious, and just like the way I liked it as a child.

So I learned my lesson..........
I don't like vinegar, and I'm better off making recipes off the top of my head.


Braised Pork Feet

Ingredients:

- 4-5 pounds of pork feet (please have the butcher cut the pork into smaller pieces. It's impossible to cut at home!)
- 1 cup of soy sauce
- 1 cup water
- 1 cup of brown sugar
- 1 oz of ginger, sliced.
- 6 cups of boiling water

Instructions:
1. Submerge the pork feet into the 6 cups of boiling water, and boil for about 6 minutes.
2. Dirty foam from the pork feet should be on the surface of the water. I boil the pig feet to get all this foam and dirt out of the meat, so I don't have to eat it.
3. Toss the dirty boiling water out, and wash all the pork feet with cold water.


The piggie feet are now alllll clean!


4. In a clean pot, boil the 1 cup of water and 1 cup of soy sauce.
5. When the mixture boils, dissolve the 1 cup of brown sugar (you can also use 3/4 brown sugar and 1/4 white sugar if you like).
6. Toss in the sliced ginger.
7. When the sugar is dissolved, place the pork feet into the sauce.
8. Simmer in lidded pot for about 1.5 hours, or until desired tenderness.
9. *NOTE* Be sure to periodically turn the pork feet around the sauce, so the flavor is evenly distributed among all pieces of the pork.


This finished result.
Piping hot!
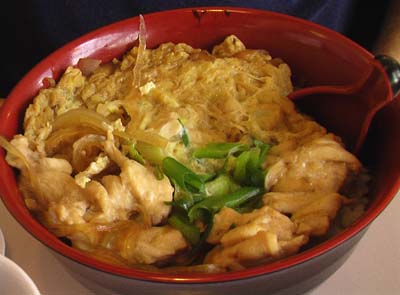
Serve over a bed of white rice.


I feel somewhat guilty eating pig feet, all that skin and fat....
But hey..
I only get pork feet every 10-15 years. So that ain't so bad..

Wednesday, September 26, 2007

Napa Cabbage-Carrot Soup!

I made this very nutritious and delicious soup consisting of only Napa cabbage and carrots!

For those of you who don't know,
Napa Cabbage is a plant of the mustard family, having an elongated head of overlapping, crinkled, broad-stalked leaves and is common in Asian dishes. It is also called celery cabbage.

I'm sure everyone knows what a carrot is, but just to be safe....
The carrot is a biennial Eurasian plant in the parsley family, widely cultivated for its edible taproot.

My co worker took me to the super market the other day, so I got to pick up some napa and carrots! YAY!
Buying fresh produce is so hard, if I don't have people to take me to the store... =/


Napa Cabbage-Carrot Soup

Ingredients:
- 1 head of napa cabbage (about 2-3 pounds)
- 5 carrots
- chicken bones (these bones are saved from the "Sweet Marinated Chicken" post
- 2 tsp salt (maybe more depending on how salty your preference is)
- 1 tsp black pepper

Instructions:
1. Wash and peel carrots.
2. Cut napa and carrots. Separate napa stems from napa leaves.
3. Place chicken bones into 5-6 cups of water, and boil.
4. When water boils, toss in carrots, and let boil-simmer for about 8 minutes.
5. Place napa stems into the water, boil-simmer for about 3 minutes.
6. Place in the napa leaves.
7. Put in salt, pepper.
8. Simmer for about 10 minutes or desired tenderness.


Oh no! The vegetables don't fit!!!
And that's the biggest pot I have!!


Okie. The veggies cooked down.
That's better.

Sweet Marinated Chicken

I love Asian food. My favorite cuisine of choice. And I also like eating everything with a bowl of steaming hot white rice. Especially hot cheetos with my white rice. Mmm Mmm Mmm.

Where was I?

Oh yea, I love Asian food, which is why I like marinating my chicken meat with any Asian ingredient I could get my hands on.

I know that adding sugar to your meat, causes the meat to burn while cooking, and causing the sugars to burn and stick on your pan.
But I love my meat sweet, so it's totally worth it!

Sweet Marinated Chicken

Ingredients:
1 tbsp soy sauce
2 tbsp oyster sauce
1 tbsp brown sugar
1 tsp white sugar
2 cloves of garlic minced
1 small piece of garlic, minced
1.5 pounds of chicken

Instructions:
1. Defat and debone your chicken (choice of meat is up to you. I used chicken thighs).
2. Save the chicken bones for later, to be used in making chicken broth in soup.
3. Mix all ingredients together (chicken + seasonings)
4. Let chicken marinate over night. I left mine marinate for about... oh 4-5 days..... =/


Cooking:
5. Heat up pan with oil.
6. Set chicken down to cook.
7. Turn chicken over when chicken turns golden brown.


8. When both sides are golden-brown, remove from heat.
9. Serve!

Tuesday, September 25, 2007

Mexican Cupcakes for Jeff's Birthday

So this recipe post is wayy behind!
I made cupcakes for Jeff's birthday, which was Sept 14, and I am posting the recipe on on the 25th...
ok, I'm not that far behind!

So Grace lent me this Mexican cake recipe of hers (thanks!), since I wanted to try a new form of chocolate cake!
Of course, Jeff likes his cake in cupcake form, so I poured the cake batter into cupcake paper. and the cupcakes came out very.... unique.
Mexican cupcakes have more of a spice flavor, rather than the milk chocolate flavor my taste buds are accustomed to.

So if you like chocolate with a spice/cinnamon-y flavor, this is a recipe to try:

Mexican Chocolate Cake/Cupcake

Ingredients:

3 disks of Mexican chocolate, chopped
2 oz of unsweetened chocolate, chopped (I cheated and used semi- sweet!)
2 cups flour
1 1/2 tsp baking powder
1/4 tsp salt
1/2 tsp cinnamon
1 1/2 sticks of butter
1 cup sugar
3 eggs (separated)
2 tsp vanilla extract
1 1/2 cups milk

Instructions

1. Chop up the Mexican chocolate. It was hard work! phew!


2. Add the unsweetened/semi sweet choclate to Mexican chocolate

3. In a separate bowl, pour in the flour


4. Add baking powder, salt and cinnamon with the flour.


5. Gather the remainder of your ingredients! Yea. That's a good idea...


6. Separate your eggs. I separate eggs by transferring the egg yolk from one shell to another, then letting the egg white drip into a bowl, in the process.


7. The eggs are separated! (whites on the left, yolks on the right)


8. Melt the chocolates. I melted my chocolate by immersing the chocolate bowl in a hot pot of boiling water, and covering the pot.


9. In a separate bowl, cream the butter and sugar together.


11. Add in melted chocolate and mix well. Yum?


13. Add in flour mixture and milk, alternating. Mix well. Add in 1/3 of egg whites.

14. All mixed!


15. Beat egg whites til stuff, then fold in remaining egg whites.

16. Preheat oven to 350 F.

17. Line up cupcake cups, and fill cups 3/4 full with batter. Put into oven.


25- 30 minutes later.....

18. Cupcakes are done baking!!


19. Frost the cupcakes.


20. Birthday boy and his cupcakes!

Wednesday, September 12, 2007

Chicken & Egg Donburi

Last night, I was trying to follow a recipe that I ripped off a Nishiki rice bag, for chicken donburi.

However, while reading the recipe, I just did not agree with some of their ingredients or proportions.

Yea....
I have a hard time following directions, both in cooking and other aspects of life...
I just gotta do things my own way...

btw, no pictures today!
Sorry. I felt ill while I was cooking dinner. I just wanted to get in and out of the kitchen quickly.


Chicken & Egg Donburi (Oyako Donburi)


Ingredients

4 chicken thigh meat (around 1 lb of meat?)
2 cups water
3 eggs, beaten
2 stalks of green onion, chopped
2 tbsp soy sauce
1 tbsp oyster sauce*
1 medium onion, thinly sliced

* you can also add more soy sauce and some brown sugar instead of using oyster sauce

Instructions

1. Defat chicken thigh meat.
2. Heat up a small drop of oil in a skillet, and throw chicken meat in. Stir.
3. Throw in onion, water, soy sauce, and oyster sauce.
4. Let simmer for about 5 minutes.
5. Skim off any foam off the top.
6. Mix beaten eggs and green onions.
7. Pour egg mixture evenly over the chicken mixture. Do not stir.
8. Let the food simmer for another 5 minutes.
9. Serve by scooping the chicken mixture over a bowl of rice. Don't forget to pour some of the gravy over the rice also.


Not my own photo, but this is how chicken donburi typically looks:

Daikon Soup

Daikon... White Carrot.... Turnip,
I have heard all types of names and variations for this mystery root/vegetable.

But whatever it is, they make really good soup!

Daikon Soup

Ingredients
1 medium daikon (about 2 pounds?)
5 cups water
4 chicken leg bones (for broth)
2 tsp salt
1 tsp black pepper


Instructions:

1. Wash daikon root, and peel off the outer skin.


2. Cut up daikon


3. Make chicken broth: place chicken bones in water, and boil for about 5 minutes.
4. Scoop off any foam
5. Throw in chopped daikon.
6. Let daikon boil, then turn the flame down, to a slow simmer.
7. Put in salt and pepper. Add more to taste.
8. Let daikon simmer for about 20 minutes, or until desired tenderness.
9. Serve! Careful, it's still hot!

Wednesday, September 5, 2007

Salty Steamed Chicken REVISED

GAH. I have been so behind on posting my recipes!
But it seems like every time I post 1 entry, that takes about 30-1 hour... I have no idea why I take so long...

So today's recipe, is actually a revised version of a previous dish I made:
"Steamed Chicken"
, which was posted on August 16, 2007.

I was not thoroughly satisfied with my original attempt at the dish.
So I made some revisions and I tried again.
And I am GLAD that I tried again, because this time, it tasted so much better!

( some changes I have made was:
I used a whole chicken, I upped the amount of salt used, I left the salt sink into the chicken overnight, I added cinnamon and black pepper to the chicken, and I added minced garlic )


Salty Steamed Chicken (REVISED)

Ingredients:
- 1 whole chicken (about 3 pounds)
- 2 stalks of green onion (sliced)
- 2.5 tbsp salt
- 1 tsp sugar
- 1 pinch of cinnamon
- 1/4 tsp black pepper
- 10-15 fresh slices of ginger
- 2-3 cloves of garlic (smashed/minced)

Instructions
*note* preparing the chicken requires 2 days! so this isn't exactly a last minute meal-deal here!

1. Wash whole chicken and remove giblets
2. Cut butt cheek fat off chicken and discard
3. Towel dry the fowl. Rub salt and sugar all over the chicken, under the skin, on the skin, inside the cavity... everywhere!
4. Wrap chicken in a bag or saran wrap, and let chicken sit in the fridge over night. This allows the salt on the chicken to sink into the meat.
5. The following day.....
6. In a small bowl, combine the minced garlic, cinnamon, and black pepper.
7. Rub garlic mixture all over the chicken. Yes... under the skin, on the skin, inside the cavity... everywhere!
8. Lay sliced ginger and green overs on top of the chicken, under the skin, and inside the cavity, also.
9. Set chicken in steamer.
10. After the water boils, let the chicken steam for about 55 minutes to 1 hour.
11. Chicken is done when the meat no longer bleeds, and the skin pulls away from the bone.


Photos!:


Raw Chicken. All done marinating, ready to be steamed.


Chicken, done steaming!
Notice, how the skin pulls away from the bone, on the legs. this usually is an indicator that the chicken is done!


Me removing the chicken from the steamer!


Whole chicken on a plate.


Chop up the chicken!
Sorry.... I wish I knew how to cut chicken better.....