Saturday, July 19, 2008

French Green Beans

Vegetables are definitely something I need to have more of. It's just so hard because it's so hard to always have fresh vegetables on hand! Veggies go bad so fast...

But don't get me wrong, I do love vegetables though!
The colorful dark ones are the best. They are more flavorful and are more nutritious than the pale, sad, ones (like lettuce).

One of my favorites, of course, is the delicious green beans. Just a dash of s & p (salt and pepper) and I can eat a plateful!

Sauteed French Green Beans

Ingredients:

- 12 ounces of extra fine french green beans (very tender!)
- 1 clove of garlic minced
- 1/4 cup of onion, coarsely chopped
- salt and pepper for taste
- 3 cups of boiling water
- 1 tbsp of olive oil

Instructions:
1. Bring 3 cups of water to boiling

2. Chop your onion.


3. Mince your garlic

4. Blanch your green beans, by boiling your green beans in the water for about a minute.


5. Drain your green beans and rinse with cold water to stop the cooking process.

6. In a skillet, heat up your olive oil, then add the garlic and onion.


7. When the onion is golden, toss in the green beans.

8. Add your s & p and toss some more.


9. You're done! Quick and delicious!!

Miso Salmon Steaks

Miso is one of those things that I love but I rarely have!
And when I do have miso, it's usually in such small and subtle amounts, like in miso soups.
I want some miso that I can really dig my teeth into!
My Miso Salmon Steaks are the answer to my cravings!

And for those out there who have no idea what miso is:
"Miso (みそ or 味噌, Miso?) is a traditional Japanese food produced by fermenting rice, barley and/or soybeans, with salt and the fungus kōjikin (麹菌, kōjikin?) (the most typical miso is made with soy). The typical result is a thick paste used for sauces and spreads, pickling vegetables or meats, and mixing with dashi soup stock to serve as miso soup called Misoshiru (味噌汁, Misoshiru?), a Japanese culinary staple. High in protein and rich in vitamins and minerals, miso played an important nutritional role in feudal Japan"
-- (lazy Jen stole this from Wikipedia... hehehehehe)


Miso Salmon Steaks

Ingredients:
- 3 salmon steaks (about 4 -5 ounces each)
- 3 tbsp of miso paste (I prefer shiromiso/"white miso")
- 1 tsp of soy sauce (I actually used more in my original recipe, but the result came out too salty so I am cutting the soy sauce amount down to only 1 tsp)
- 2 tsp of brown sugar


Instructions:

1. In a bowl, thoroughly mix together the miso paste, soy sauce, and brown sugar


2. Place the salmon steaks on a baking sheet.


3. Evenly spread a layer of the miso mixture across all 3 salmon steaks.


4. Heat your oven to 400 degrees, and bake your salmon for about 20 minutes, or until the edges are crunchy and the fish meat is flaky.


5. All finished! Enjoy with steamed rice =) YUMM. loooove miso.

Ice Cream Baseballs

Here is an idea for a quick and simple dessert: Ice Cream Baseballs!

Or you can also call them ice cream ping pongs... golf balls.... soft balls.... volleyballs.... depending on the size you decide to make 'em!
Volleyball sized for me please =D

This recipe is basically scooped ice cream rolled into crushed cookies of your choice, for example graham crackers, oreos, vanilla wafers, rice crispies.... the options are endless!

Ice Cream Baseballs

Ingredients:
- 4 scoops/balls of ice cream (2 per person). Any flavor ice cream.
- 1 - 2 cups of crushed cookies (depending on the size of your ice cream balls). I used graham crackers
- chocolate syrup

Instructions:
1. Break and crush your cookies, and lay the crumbs onto a flat surface, such as a large plate or cookie sheet.


2. Scoop our your ice cream, using a spatula to help shape the ice cream into perfect round balls.

3. Set the ice cream baseballs on top of the crumbs, and coat the ice cream with all the crumbs.


4. Set the ice cream into the freezer for at least 15 minutes. This can also be done before dinner
time, so the ice cream will set in the freezer as you enjoy dinner, and will be ready by dessert time!

5. Set the ice cream into serving bowls and drizzle with chocolate syrup!

Saturday, July 12, 2008

Pan Seared Tofu with Scallions

I found another set of pictures buried in my camera!
This time it's a tofu dish!
Yum, I love tofu. I should have tofu more often! It's healthy and also filling!

Pan Seared Tofu with Scallions

Ingredients:
- 1 box of 'firm' tofu
- 1 tbsp of oyster sauce
- 3 stalks of green onions/scallions. Use both the white and the green parts.
- 2 tsp of soy sauce

Instructions:
1. Cut tofu up into cubes and slice the green onions.


2. Generously oil the skillet, add the green onions, and and tofu.


3. Cook each side of the tofu until golden.


4. Add the sauce and mix evenly.


5. Enjoy with rice!


Such a simple recipe! It's only somewhat time consuming, to wait for the tofu to fry golden. But difficulty-wise, it's so easy!

Tuesday, July 8, 2008

Garlic & Herb Roasted Chicken

Today, I had dinner at my ex-boss' house. It was a pot-luck themed dinner (where I brought in some dishes I made at home) even though it was just Lake (my ex-boss), Jeff (my boyfriend), and me eating. A really small get-together with a lot of food..... works for me! :)

The items I brought was: whole roasted chicken and scallion pancakes (recipe previously blogged here: http://jensconcoctions.blogspot.com/2008/06/scallion-pancakesgreen-onion-pancake.html).

Everyone loved the chicken, and Lake made sure she kept some of the chicken for lunch tomorrow!

I loved Lake's russian dish of tomato beef. I shall try out her recipe soon, and blog about afterward. So check back soon, for that recipe!


NOTE: this dish is a 2-day dish, so don't intend on making this on a work night! Save it for a weekend activity or romantic date night.


Garlic & Herb Roasted Chicken

Ingredients:
- 1 whole chicken (about 3-4 pounds)
- 1 tbsp salt
- 1 tsp of any of your favorite dried herbs. I used basil.
- 1 tbsp of any of your favorite fresh herbs. I used finely minced parsely!
- 1.5 tbsp of salt-free garlic & herb powder
- 2 tbsp of olive oil
- 3 cloves of whole garlic, punctured.

Instructions:

DAY ONE:
1. Wash your chicken and remove the giblets. Pat dry your chicken with a paper towel. Dry the inside cavity of your chicken by stuffing a paper towel inside.

2. Using your fingers and a knife, carefully seperate the skin from the chicken, starting for the breast meat down to the legs. Make sure you do not puncture any holes through the skin. Use the knife to cut away the connective membrane.

3. In a bowl, mix together the salt, herbs, and garlic powder. Reserve 1/5 of the mixture aside.

4. Using your hands, evenly spread the herb mixture underneath the skin across the whole chicken, massaging the herbs into the meat.

5. Using the reserved mixture, dump the herb mixture into the cavity of the chicken and rub the herbs into the inside of the chicken. Drop the garlic cloves into the cavity.

6. Your hands should have excess herbs and salt stuck on it. Use it to wipe the excess herbs onto the outer skin of the chicken.
=) nothing goes to waste when I'm cooking!


7. Set your chicken into the fridge, and let it marinate overnight or for at least 6 hours. The salt also helps soften the chicken meat.


DAY TWO:
1. Preheat oven to 450 degrees F. Drizzle and rub the olive oil onto both sides of your chicken.

2. Place your chicken, breast side down, on a roasting rack, with a roasting pan underneath to catch all the juices. The chicken is breast side down, so as the chicken roasts, all the juices will drip down into the breast, softening the breast meat.


3. Place your chicken into the often, for 20 minutes.

4. At the 20 minute mark, turn the oven down to 335 degrees F and roast for 40 minutes (you can use either 325 or 350 degrees, if your chicken is smaller or larger than mine).

5. At the 1 hour mark, turn the chicken over to brown the breast meat.

6. Roast for an additional 30-35 minutes. Puncture the thickest part of the meat (I check the thigh meat), to make sure the juices run clear.

7. Let the chicken sit for 10 minutes to allow the juices to redistribute. Isn't that beautiful?


Size of Jeff's head!


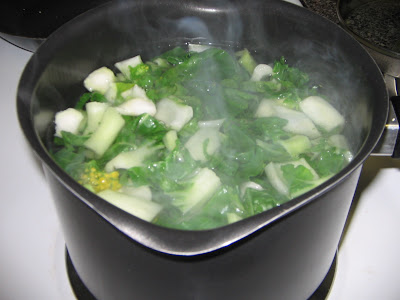
8. Serve the meat, and reserve the bones and carcass to make brothy soup! The bones should already be tasty enough to give the soup a lot of flavor and seasoning.
See. Nothing goes to waste when I'm cooking!

The pot-luck for 3 came out wonderful!
We also enjoyed red wine during our meal, and Cheesecake factory cheesecake for dessert.


Sunday, July 6, 2008

Seafood Baby Bok Choy

I am so behind on recipes!
I did not realize how behind I was until I checked my camera!
This dish is so refreshing and light.

I used fish pollock for the seafood component of this dish, but feel free to substitute using other seafood, such as mussels, scallops, or shrimp.


Seafood Bok Choy

Ingredients:
- 4 bunches of baby bok choy
- 6-8 ounces of sea food. (I used fish and cut it into cubes!)
- pinch of salt
- 2 tbsp of tapioca starch


Instructions:

1. Chop up the baby bok choy

2. Massage the flour into the seafood.

3. Blanch the bok choy in boiling water for 2 minutes and drain.


4. Well oil your skilled, and fry up your seafood until almost cooked (about 3 minutes on the skillet)


5. Add your bok choy and salt to the seafood and stir.


6. Add a splash of water, so the veggies are moist..


All done! yum!